


Let’s face it: most of us find winter a bit of a drag. The mornings are cold, the afternoons are dark and stepping outside requires us to wear way too many layers to be fashionable. Fortunately, while you’re dressed head to toe in a heavy coat or disappearing into an oversized jumper, there are other ways you can showcase your unique style. With just a lick of nail polish and a sophisticated, seasonal manicure, you can totally transform yourself and instantly wash away those winter blues.
Last time, we showed you how to jazz up your nails with a gorgeous blue no sponge gradient nail art tutorial. Today, we’re moving onto a simple beginner’s freehand nail art design that perfectly showcases the chilliest season.
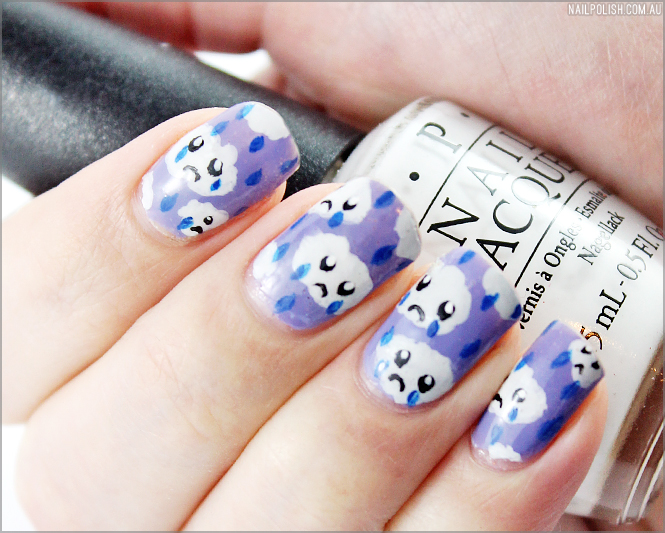
Most winter nail art ideas involve Santa and snowflakes, but Down Under we’re all about the rain. So, we’ve created a sad cloud nail art design using OPI nail polish that is almost too cute to be true.
Let’s get started!
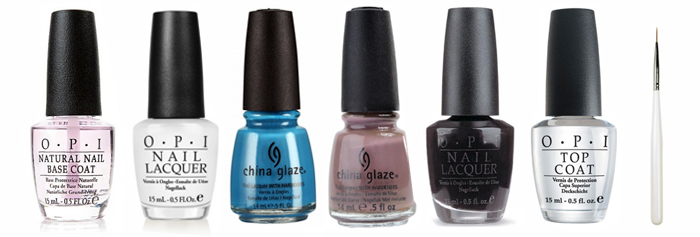
You Will Need:
OPI Black Onyx Nail Polish
A Nail Art Brush and/or a Dotting Tool
Aluminium Foil or Similar Mixing Surface
Nail Polish Remover/Acetone
Step 1:
You should always begin your manicure by carefully prepping your nails. Start by washing away any natural oils from your nails, then dry your hands thoroughly. Next, apply a thick coat of OPI’s Natural Nail Base Coat. This will protect your nails from staining and make your manicure last longer.
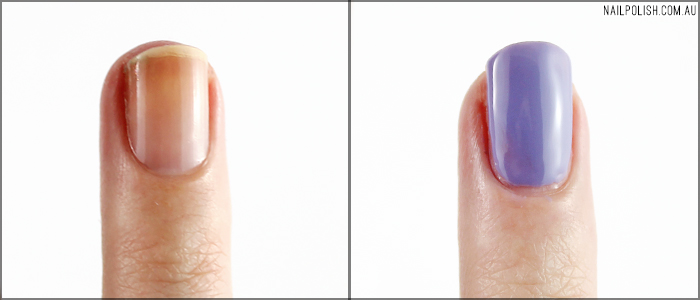
Step 2:
Once your base coat is completely dry, it’s time to apply a cool lilac or plum colour to your nails. Pick something from your collection that reminds you of a moody, winter evening, like China Glaze’s Below Deck.
Wait for your first coat of polish to dry before applying a second coat. If your polish is completely opaque, you can stop here. If not, apply one more, thin coat to even things out.
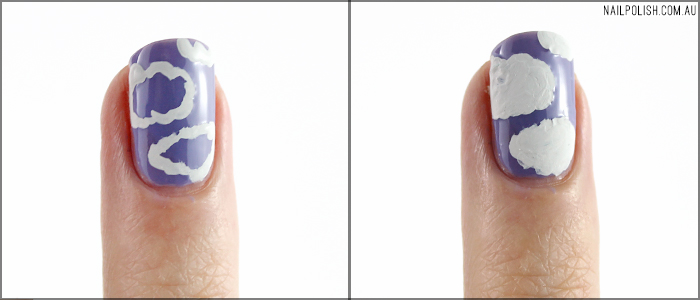
Step 3:
Now our purple base colour is dry, it’s time to start painting our design.
Using either a nail art brush or a dotting tool, combine a drop of OPI Black Onyx with a generous amount of OPI Alpine Snow on your aluminium sheet or mixing palette. You should now have an off-white colour to paint your gloomy clouds with. Paint the outline of one or two large clouds on your nail and one smaller half cloud at the top or bottom of your nail for versatility.
(If you’ve never done freehand nail art before, this step might seem a little daunting. Don’t stress - most mistakes can be easily corrected by painting over them with your original lilac colour!)
Step 4:
Using the outline you created in Step 3, fill in your clouds with your grey colour. You may need to go over each cloud twice to reach full opacity. If you’ve made any mistakes, pick up some of your purple colour on your brush and carefully paint over them.
Creating nail art requires more layers than a regular manicure. To keep these layers from looking bumpy or uneven, we can apply a thin coat of OPI Top Coat to our design. This will help to smooth down the surface and keep things looking uniform.
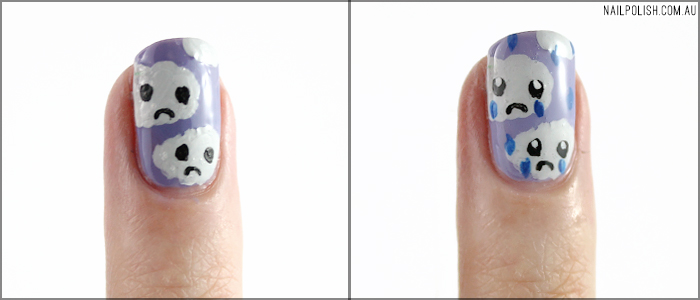
Step 5:
Once your top coat is completely dry (don’t rush this part!), you can add tiny faces to your rain clouds using your nail art brush and OPI’s Black Onyx. You don’t have to give them the same expressions we’ve given our unhappy little clouds, but adding a dot of white polish to the eyes will create that adorable anime-esque factor.
Step 6:
Finally, dip your nail art brush into China Glaze’s Aqua Baby. Using this pretty blue shade, draw tear-shaped rain drops beneath each cloud’s eyes. Complete the wintery effect by adding a few more rain drops to the background of your manicure.
Once everything is dry (you don’t want to smudge your faces!), top coat for a second time using your OPI Top Coat. This will leave you with a smooth, flawless finish and help to seal your manicure in place for even longer.
Et voila! Your freehand winter nail art is complete. With this cool design on your nails, you won’t want to wear your gloves no matter how cold it gets!
Stay Polished,
The NailPolish.com.au Team.